Filling with a color gradient
Note Before filling the layout background with a color gradient, make sure the fill for one or more layout parts is transparent. See Setting the fill, line style, borders, shadows, and padding.
-
In Layout mode, select one or more objects, a part label, or click anywhere in the layout background to select it.
Before selecting the layout background, make sure no objects or layout parts are selected.
-
In the Inspector, click the Appearance
 tab.
tab. -
To change the appearance of the object or the body part when it's in a particular state (for example, when a button is pressed), choose from the object state list (near the top of the tab).
-
In the Graphic area, for Fill, choose Gradient.
-
Using the gradient control:
To
Do this
Specify colors to be blended
Click the color stops
 on the gradient control and choose a color from the color palette.
Add colors to the color gradient
Click anywhere on the gradient control to add more color stops.
Reduce colors in the gradient
Drag color stops off the gradient control.
Change the direction in which the fill is blended
Click
 or
or  .
.Change where a linear gradient blends
-
For Angle, enter a value.
-
macOS: Drag the angle control
 .
.
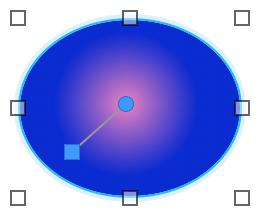
Change the start and end points of a linear color gradient or the center point and radius of a radial color gradient
On the layout, drag a blue handle of the gradient control on the image.
Reverse gradient colors left to right or center to outside
Click
 .
.Change the gradient on the object.
Use the
 control on the object.
 -
Notes
-
Layout background fill does not extend behind navigation parts.